Interactive video for e-learning
Enhance online learning with SCORM-compliant interactive videos that integrate seamlessly into your LMS. Add quizzes to reinforce understanding, branching scenarios for personalised learning paths, and clickable overlays for extra resources and information. Track progress and engagement in real time to improve learner outcomes and deliver a richer, more effective e-learning experience.
Trusted by leading brands around the world


SCORM-compliant interactive video for your LMS
Cinema8 enables you to create SCORM-compliant interactive videos that seamlessly integrate with your LMS. Add quizzes, branching scenarios, and clickable overlays to make learning active and personalised. Multi-language subtitles make content accessible for global audiences, while detailed analytics and heatmaps reveal learner engagement patterns. With xAPI and SCORM support, progress and scores sync directly to your LMS, ensuring accurate tracking. Update videos anytime with version control to keep your e-learning content fresh without disrupting existing courses.
How to create interactive e-learning videos with Cinema8
Design SCORM-ready videos that engage learners, personalise the journey, and track results whilst integrating easily into your LMS.
Upload your e-learning videos to Cinema8 via the dashboard, bulk import, or API. Organise by course, module, or lesson for a clear learning structure.
Add interactive layers such as quizzes, branching paths, clickable elements, and information overlays. Enable subtitles in different languages to make content accessible to a wider audience.
Publish to your LMS using SCORM or xAPI. Track completion rates, quiz scores, and engagement data to continuously refine your e-learning programmes.
Why use Cinema8 to create interactive e-learning videos?
Cinema8 lets you turn standard e-learning content into interactive, SCORM-compliant experiences that plug directly into your LMS. Add quizzes to reinforce knowledge, branching to customise learning paths, and clickable overlays for extra resources. Track learner progress, scores, and engagement in real time, ensuring your courses are both effective and measurable at scale.
How Cinema8 interactive video improves e-learning delivery
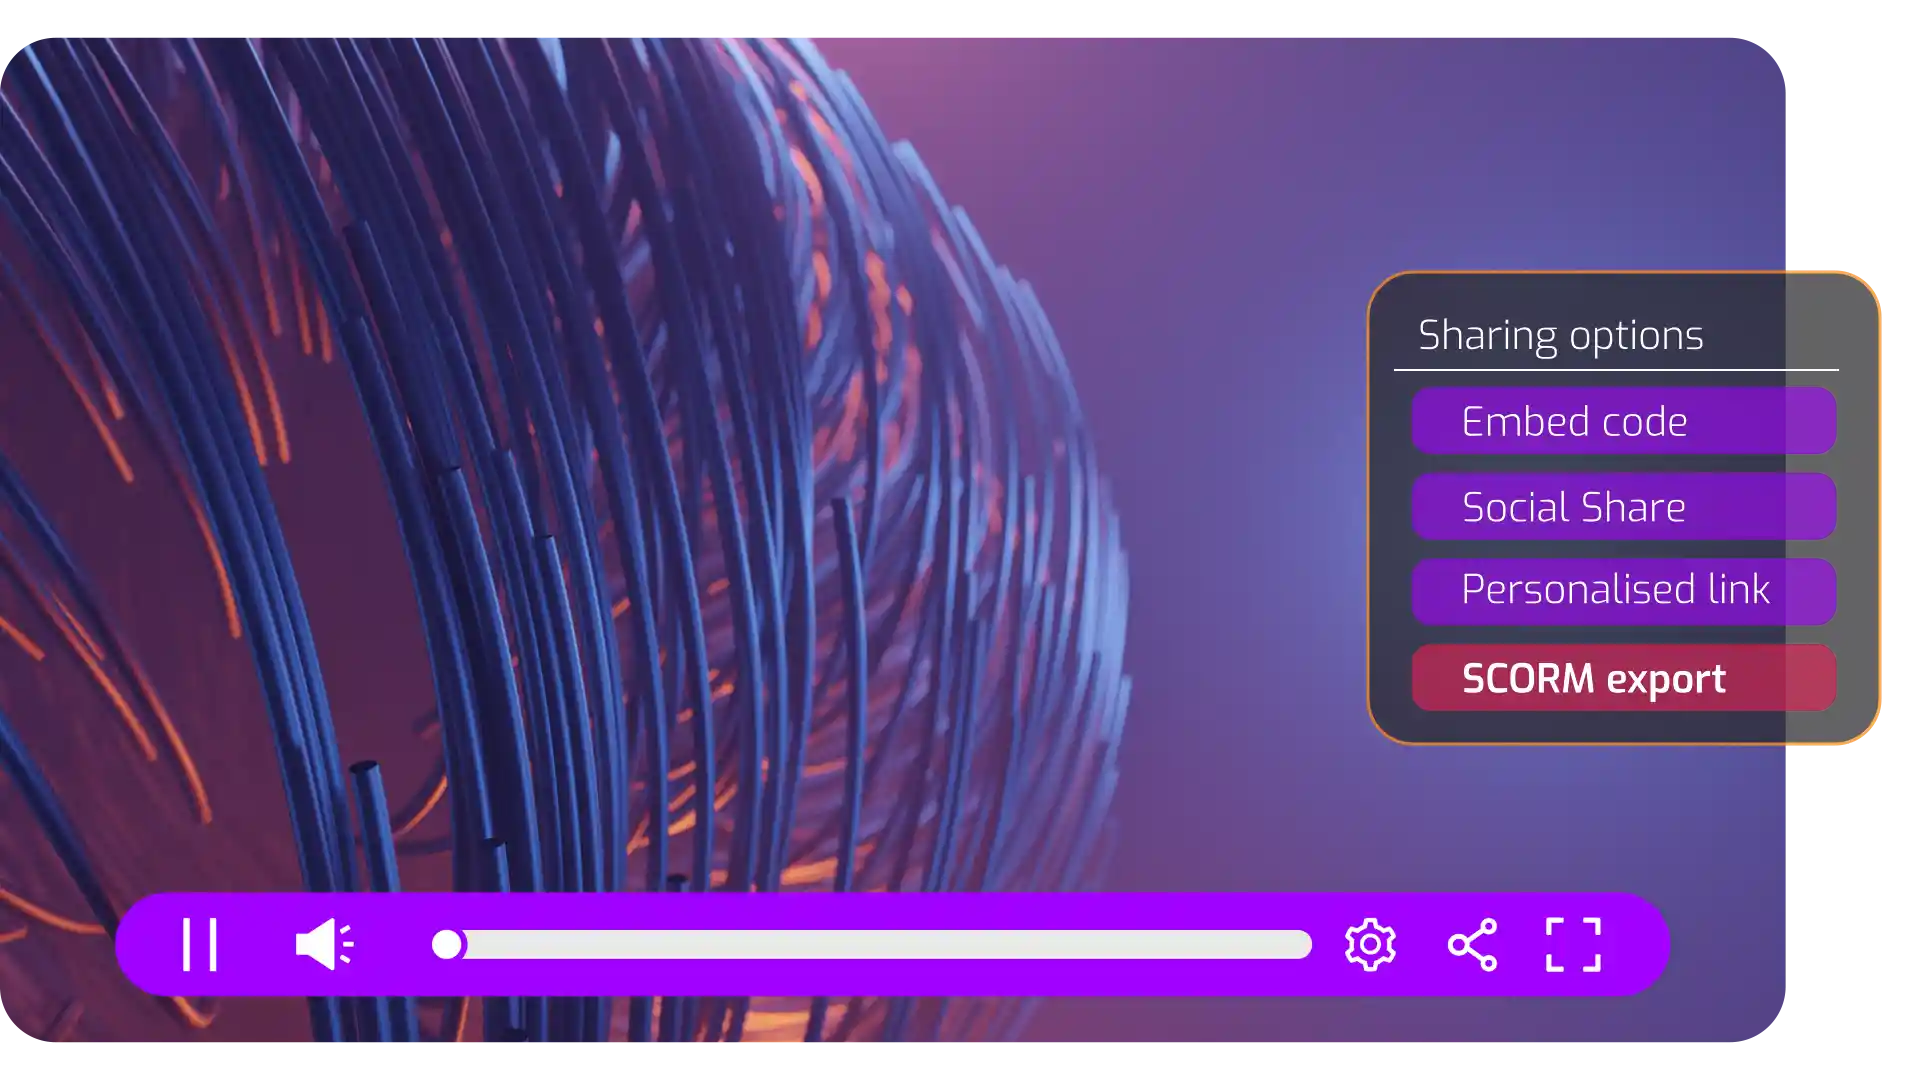
SCORM and xAPI support for LMS integration
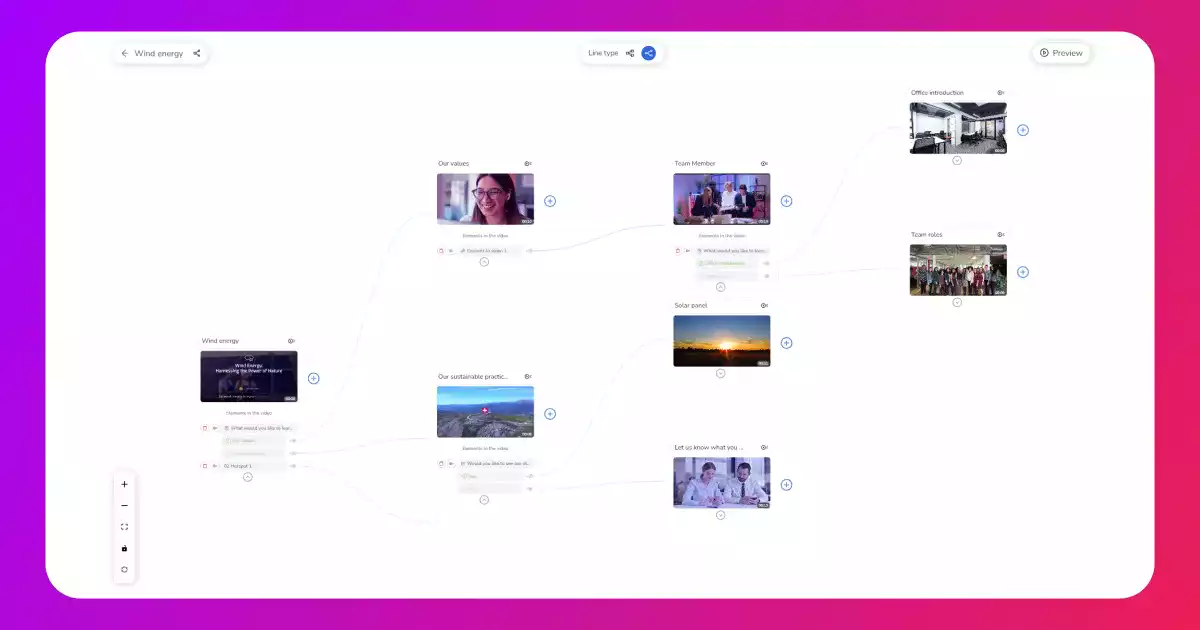
Quizzes and branching for personalised learning
Analytics and heatmaps to track learner engagement
Deliver compliance courses as SCORM-compliant interactive videos that integrate seamlessly with your LMS. Add quizzes to confirm understanding, track completion for each learner, and meet regulatory requirements with verifiable data.
Design role-specific or skill-based learning paths using branching scenarios. Give learners interactive training materials that let them explore relevant topics while tracking their engagement and performance to adapt future course content.
Make your e-learning accessible worldwide with multi-language subtitles and localisation options. Pair interactive content with analytics to see how learners engage across different regions and cultures.

Discover why teams trust Cinema8 to create high-impact interactive videos
During travel restrictions, Cinema8 proved valuable as a tool. Its platform offered straightforward yet complete tools, allowing us to give virtual demonstrations of our solutions in a secure and efficient way.
Jay Yalung
Art Director, Marketing and E-Commerce / Leica Geosystems
Cinema8 software engaged and motivated students with 360-degree videos at the Tate Gallery, featuring past student projects. Staff support was responsive and helpful with training. A valuable tool for educational institutions.
Chi-Ming Tan
Unit Lead Lecturer LCCA / London College of Contemporary Arts
Cinema8 has been instrumental in compiling all of the videos for a research project on employment for the blind or visually impaired, by offering an easy-to-use web-based platform for building Interactive Videos.
Sarah Moody
Communications Coordinator / Mississippi State University
Cinema8 was chosen for its ease of use and ability to create interactive videos through an intuitive interface. The team received great support and reasonable pricing. leading to a renewal of their partnership. Cinema8's support helped them meet project deadlines.
Michel Sohel
Media Consultant / Eastern Michigan University