
Cinema8 Live Stream is a secure live video broadcasting feature that allows you to stream directly from mobile or desktop, share the broadcast with your audience, and automatically save it in your library for future use. Unlike consumer platforms, Cinema8 enables brands, educators and creators to host professional live events, add interactivity afterwards, and maintain full control over their content.
How Cinema8 Live Stream works
Starting a Cinema8 Live Stream begins with creating a Live Project inside the platform. Once created, you receive an RTMP link and a broadcast link. The RTMP link connects your chosen streaming application to Cinema8, while the broadcast link can be shared with your audience or embedded directly on your website. Every session is recorded in your Cinema8 library, so after your broadcast ends you can edit the stream and add new overlays with interactive elements such as call-to-action overlays or lead generation forms.
Live streaming across devices
Cinema8 Live Stream is compatible with the most popular RTMP-enabled apps on mobile and desktop. On mobile, many users choose Larix Broadcaster, which works reliably on both iOS and Android, letting you paste in the Cinema8 RTMP link and go live within minutes. On desktop, Open Broadcaster Software, better known as OBS, is widely used to deliver professional-quality streams. OBS allows you to combine different inputs, switch between multiple scenes during a live broadcast, and add branded graphics such as logos or lower-thirds without requiring specialist equipment.
When you log in to Cinema8, you need to follow Project>>>Create Live Project to create live streams.

When this path is followed, you will see the screen where you can create a new live stream. Let's examine this screen.
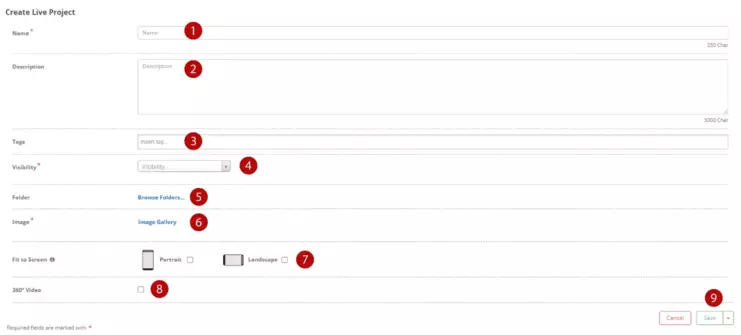
- Write the name of the live stream
- Write a description of your live stream
- Add tags to the live stream
- Edit the visibility settings of the live stream
- Place the live stream in the folders in Cinema8
- Select a preview image to the live stream
- If the resolution of your live stream does not match the resolution of the viewer's device, you can select the option to fill the screen here.
- If the live stream is 360 degrees, the option you will mark
- Save all the settings you have prepared.
After making all the adjustments and clicking the "Save" button, you are ready to receive RTMP link.
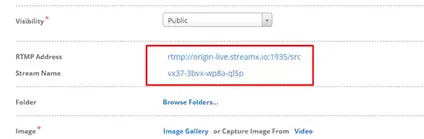
The RTMP link that we will use when opening a live stream is now ready. You can ask the question "How do we get this RTMP link and open the live stream ". Let's look at this in the next steps.
Live Streaming Applications to Use
In this section, let's see in which applications we can successfully run the RTMP code given by Cinema8 in the previous section.
Some applications that you can use RTMP code to broadcast successfully on IOS;
- iLive - Live Video Streaming (Free - Offers In-App Purchases)
- Live Now - Live Stream (Free - Offers In-App Purchases)
- Larix Broadcaster (Free)
Some applications that you can broadcast successfully on Android using RTMP code;
- Ace Live Streaming & PC Mirroring (Free - Offers In-App Purchases)
- Larix Broadcaster (Free)
- RTMP Camera (Free)
- OvenStreamEncoder (Free)
The main application that you can live stream successfully on PC using RTMP code is;
- OBS (Open Broadcaster Software) (Free)
Through OBS, you can open impressive live streams both for free and with different features.
How to choose a Broadcast Source Application for Live Streaming
When choosing a live streaming app for Cinema8, it is important to check whether the tool charges extra for resolutions above 720p. Among mobile options, Larix Broadcaster is recommended because it runs smoothly on both iOS and Android, is free to use, and supports high-resolution streaming without restrictions. For desktop users, OBS is the most popular choice. It is free, widely trusted, and offers advanced features such as scene switching, multi-screen setups and graphic overlays, making it the industry standard for professional live streaming.
Turn on Cinema8 Live Stream from a Mobile Phone
You created a Live Project in Cinema8 and now you have an RTMP code. Let's see how you can stream on IOS and Android through this RTMP code. We will use Larix Broadcaster on IOS and Android.
How to live stream using iOS
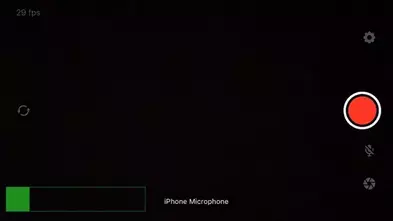
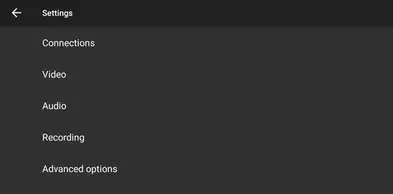
First of all, we install the Larix Broadcaster application on our phone. When we open the application, we see a screen like the one below. From here, we click on the settings button on the top right.
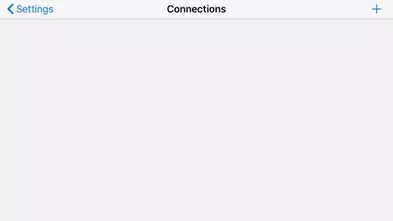
Then click the "Connections" button.
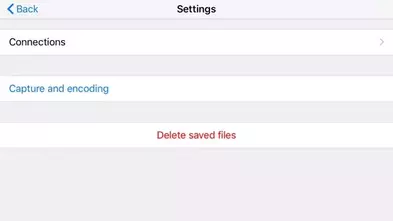
Click on the plus button at the top right of the screen that opens.
Fill in the required fields on the screen that opens. The important place here is to write the RTMP code you received from Cinema8 in the URL part.
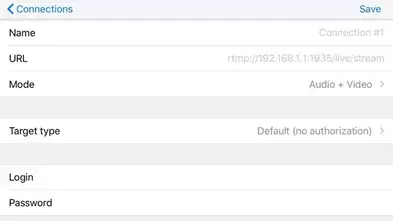
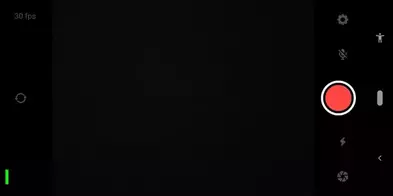
After making all the settings, click the "Save" button on the top right to save the live stream. Then select the live stream you just created on the "Connections" page that opens. When you select the live stream you have created, you will see the camera screen. You can now start your live stream by pressing the record button.
You can find the link of the live stream you opened by visiting the Cinema8>>>Projects screen in the preview area.

How to live stream with an Android device
To live stream using an Android device, install the Larix Broadcaster application on our phone. Once you open the application, you'll land on a screen as shown in the image below. From here, click on the settings button on the top right.
Then click the "Connections" button.
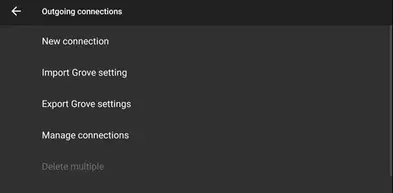
Click the "New connection" button on the screen that opens.
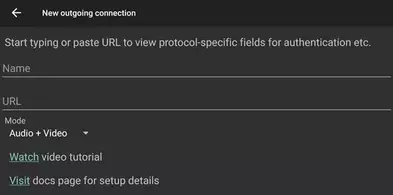
Fill in the required fields on the screen that opens. The important place here is to write the RTMP code you received from Cinema8 in the URL part.
After making all the settings, click the "Save" button on the bottom right to save the live stream. Then, you can return to the main screen of the application from the opened page and start the live stream.
You can find the link of the live stream you opened by visiting the Cinema8>>>Projects screen in the preview area.
How to live stream using a PC
You created a Live Project in Cinema8 and now you have an RTMP code. Let's look at how you can broadcast on a computer through this RTMP code. We will use the OBS program to open Cinema8 Live Stream on the computer. Using this link, download an OBS extension to your computer.
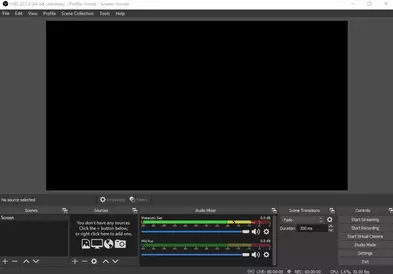
When you open the program, you will see a screen like the one below. On this screen, follow the File>>>Settings>>>Stream from the top left.
You will see a screen like the one below.
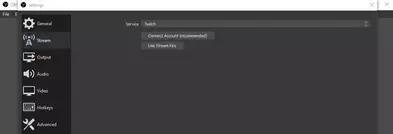
In the service section here, "Twitch" will be selected by default. Click here and choose the "Custom" option.
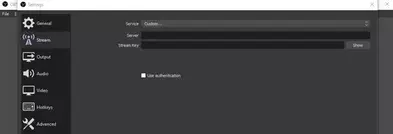
Inside OBS, you will see the fields labelled Server and Stream Key. To complete the setup, return to your Cinema8 Live Project and copy the RTMP Address into the Server field and the Stream Name into the Stream Key field. Once these details are entered, click Apply and OK to save your settings. You can then begin your broadcast by selecting Start Streaming on the main screen, which will immediately connect your stream to Cinema8.
OBS also makes it possible to enhance your broadcasts with custom visuals. Using the Scenes panel, you can create and manage different layouts that appear during your live stream. For example, by adding a “lower third” graphic—an image overlay at the bottom of the screen—you can display speaker names, job titles or other important information in real time. This is done by creating a new scene in OBS, adding an image source, and uploading the lower third graphic. Once saved, you can switch between scenes seamlessly during your broadcast, giving your live stream a professional and dynamic feel.
Another advantage of OBS is its ability to handle multiple screens in a single broadcast. You can set up a main screen for your presentation, a second scene for your webcam view, and a third for a secondary monitor. By creating these scenes in advance and assigning each to the appropriate input, such as display capture for your screens and video capture for your webcam, you can move between them with a single click while live. This flexibility is particularly useful for product demos, webinars or training sessions, where different types of content need to be shown in one continuous broadcast.
Every live stream you create through Cinema8 is automatically saved in your library. Within Cinema8 Creative Studio, you can access the recording under the Library tab, listed with the same name as your live project. Once the recording status shows as “Ready,” the video is available to use immediately. You can publish it as a recording, edit it further, or add interactive elements such as clickable buttons, lead generation forms or booking widgets. Even if the original project is deleted, the video remains securely stored in your library until you decide to remove it.